
How to Repair Rolling Shutter in Adobe Premiere Pro
Premiumbeat by Andrew Devis
 If you shoot with a DSLR or camera phone you’ll notice that the image integrity is sacrificed if there is movement in the shot. In this post we’ll address how to repair “Rolling Shutter” problems in Premiere Pro.
CMOS sensors used in DSLR and mobile phone cameras are notorious for introducing distorition when the camera moves or pans. This type of video distorition is called rolling shutter. Luckily there are tools within Adobe Premiere Pro (and after effects) to repair rolling shutter issues in your video footage.
Understanding Rolling Shutter
First, it may be helpful to explain what’s going on with ‘Rolling Shutter’ in your video image…
As your camera scans an image, it scans in lines starting at the top and works its way to the bottom of the frame. This means that if you are panning or moving the camera as the image is being recorded, the lines at the top of the screen are being recorded at a different point in time than the lines at the bottom of the screen. So, if the camera moves the lines no longer match up. This will end up with a wobbly look to your footage.
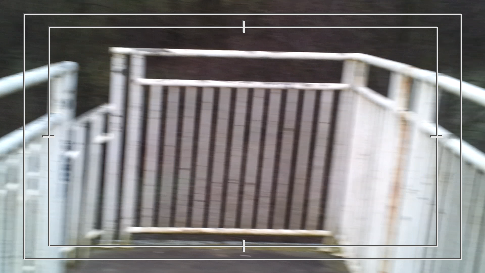
If you look for it, any time you are shown mobile phone footage and the camera is moving a lot you will see the picture warping all over the place. This is ‘Rolling Shutter’. Additionally, the problem seems to be directly proportional to the quality of the sensor your camera is using. For example, the images I’m using in this blog where taken on my mobile phone.
To see the changes we are going to make it is often helpful to have some kind of reference on screen. So if you can’t see the ‘Safe Margins’ button in your Premiere Pro Program Monitor, click the little ‘+’ button at the bottom right of the program monitor and choose the ‘Safe Margin’ button as shown. read more...